 |
 Safety Emporium is a proud sponsor of this site. |
 |
Home Page --> Tutorial Lesson 6, Cutting Glass
|
| Tutorial Lesson 6, Cutting Glass | |
|---|---|
| Lesson 5 (Burners and Torches) |
Lesson 7 (Rotating Glass) |
Cutting Glass
Glass tubing and rod come in four (4) foot lengths and metric diameters. Four feet of tubing is rather awkward to handle in the flame so we need to cut it down to a manageable size. Select a piece of 10 mm OD tubing and place it on a flat surface. Mark the glass into 16 inch lengths.
The first two methods listed here work well for smaller diameter rod and tubing. For larger diameters consider methods 3 and 4 will almost certainly be required.
Option #1 - Scratch On The Bench Then Snap
This method works well for beginners, but as you gain experience you will probably end up preferring Option #2 (which is quite similar).
- Create a scratch on the glass wall surface by drawing the corner of a file or, ideally, a tungsten carbide knife perpendicularly across the tube. as shown below:

Tip: Do this step once creating a scratch approximately 1/8 inch long. Do not saw the glass. Sawing the glass will not make the process of breaking the glass any easier. It is not necessary to make a long scratch. A short, single sharp scratch is more likely to produce a clean and even edge. 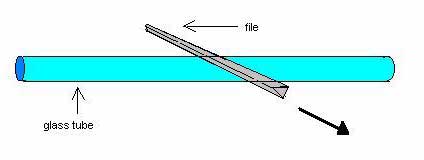
- Pick up the glass tube and wet (water, saliva) the scratch with your finger. Turn the scratch away from your body.
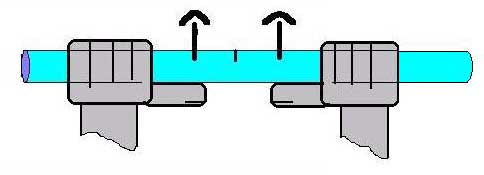
- Place your thumbs on the glass tube. The scratch should be located between the thumbs but on the opposite side of the tube as shown below. With practice you will find a distance between your thumbs that works for you.
- Push your thumbs away from you. The glass tube should break cleanly at the scratch. Safety Note: You may wish to wear work (not latex!) gloves or wrap the glass in a towel to reduce the possibility of cutting yourself.
Option #2 - Scratch While Holding Then Snap
Option #3 - Scratch and Apply Hot Glass
This option is the safest and easiest method if you have large diameter tubing but don't have a glass saw. It is also useful when repairing vacuum lines or apparatus, particularly those that are fixed in position. This method should be tried after you have had some experience handling the torch:
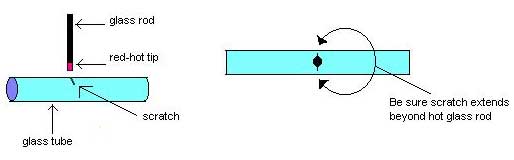
- Scratch the tubing with a file or carbide knife as described in Options #1 and #2 (above).
- As above, wet the scratch.
- Heat the end of a 6 mm rod until it is red hot. Quickly place the end of the hot rod onto the wet scratch. Be sure the scratch line extends beyond the contact area of the hot rod.
| Tip: If done correctly, you will observe a crack forming at and extending from the scratch. If the crack does not travel completely around the circumference tap the crack lightly. This action may chase the crack around the tube. Alternatively, reheat the glass rod and reapply to the crack. Again, be sure the rod does not extend beyond the end of the crack. |