 |
 Safety Emporium is a proud sponsor of this site. |
 |
Home Page --> Glass Workshop Tour
|
 |
 Safety Emporium is a proud sponsor of this site. |
 |
Home Page --> Glass Workshop Tour
|
The scientific glassblowing facility at East Carolina University shown here opened in the fall of 2003. This modern facility offers an efficient layout for professional glassblowing services and is an educational and instructional example of a modern university research glassblowing operation and design. While the final design differs slightly from initial plans, the final version is based upon much of the information found in Designing the Glassblowing Shop.
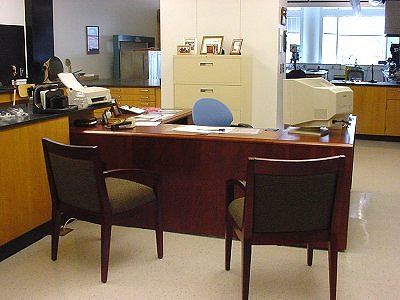
The administration and customer interaction area is located at the entrance to the glassblowing facility. For customer safety, storage cabinets, desk/work stations and furniture are arranged in a manner to block easy access to the Hot Zones or working areas of the shop. This space also provides an area for customer work pick-up. Visibility from Customer Service to Hot Zone and Student Bench area is open (in this one-person shop) for communication and safety.
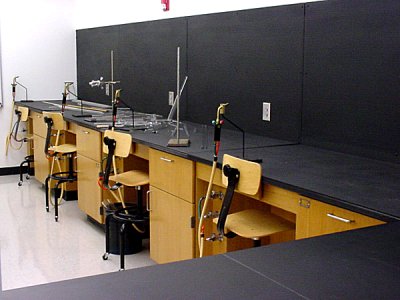
The hot zone areas include the glassblower and student benches where the hot working or forming of glass takes place. Work surfaces are a fiber/cement composition that withstand exposure to gas/hydrogen oxygen flames and hot glass. Painted flat black, the background aids in determining subtle differences in flame and glass color during the glassblowing process. Storage is provided for glass working tools and related equipment.
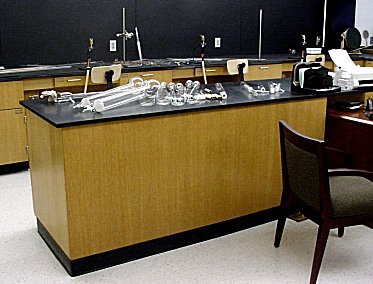
The main glassworking workbench (below, left) features a line of sight to the room entrance which permits customer interaction without having the customer enter a potentially hazardous area.
The student glassworking benches (below, right) have ample separation for safety and allow for open communication and observation between students and instructor, regardless of where he/she may be in the shop.
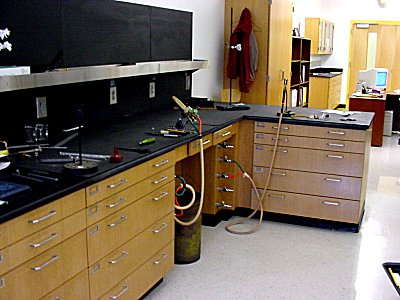
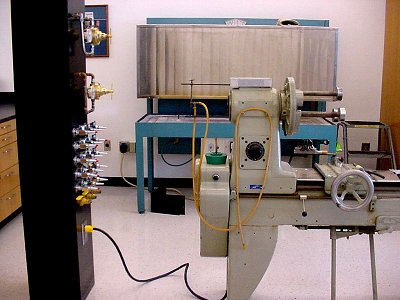
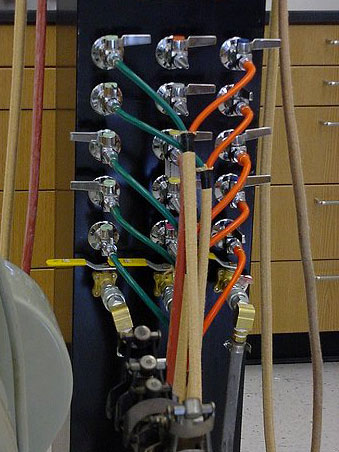
Compressed gas(es), vacuum, electricity and other services need to be delivered to the glassblower's lathe. In this facility, all service feeds are overhead. A metal housing with removable back panel was provided to enclose and protect the piping, as well as serve as a mounting platform for regulators and hose cocks. These pictures do not show all the hose and torch combinations that are readibly available to the glassblower.

The sink area features a 5 foot stainless steel sink that can accommodate the 4 foot lengths of tubing commonly used by glassblowers. The faucet and drain are at the end of the sink to maximize their usefulness.
Hot, cold, and distilled (DI) water are available and sources of compressed air and vacuum are nearby. The hand-held safety eyewash doubles as a handy rinse hose. The deep sink depth is based on personal preference; others may prefer a shallow basin. Adjacent to the sink are standard countertops long enough to serve as work or prep areas for pre- or post wash operations.
There is a canopy hood (not shown) directly over the sink to aid in chemical fume removal.
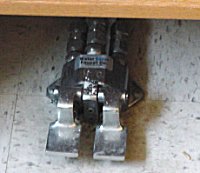
I've found that with only two hands to hold onto soapy (and slippery) glassware, foot operated on/off water valves are the way to go.
Lighting and air movement are two issues glassblowers have to address when designing a new facility. A few observations that helped determine what would be appropriate for our facility (university research) are illustrated in the two photographs below.
How much lighting is enough - or too much? Natural light conditions are controlled by window placement and exposure (if you have windows), and will change with the time of day or season of year. This lighting can be confusing to the student through excessive light reflection or glare directly on the glass being worked or onto the work surface area. Manually controlled adjustable lighting can help eliminate these problems. The left photo illustrates the use of indirect lighting to lessen glare. Open a second control switch and the lights function "normally".

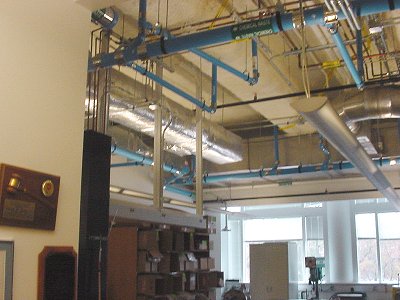
Do you want a closed or open ceiling? How about canopy hood? While much can and will be said about the use of open canopy exhaust hoods mounted directly over the glassblowers work bench or lathe, I'm of the opinion that canopy hoods may not be necessary in the university research shop. Many university research glassblowing operations do not operate under the same conditions as the private sector production facility. The university/research glassblower may spend as much (if not more) time in consultation and design as in the act of glassblowing itself. Heat and chemical releases from the glassblowing process will usually be much less than what is found in the production shop.
In many situations, a properly balanced air handling system with an appropriate number of room air changes as determined by law and/or your facility EH&S and HVAC experts will be more than adequate. Using the open ceiling approach will in effect give you the entire upper room as your canopy to collect the heated air and gases for removal through normal air exchanges. One does need to be aware of air diffuser placement, orientation and operation, however. Air drafts over the hot working areas should be avoided.
In this particular facility we opted to have a suspended (closed) ceiling over the entry, administrative and student bench areas. This was done for aesthetic reasons and the look was in harmony with the other laboratories and office areas on the floor. The rear of the glassblowing facility, where most of the glassblowing takes place, has an open ceiling.
Casework location and multi-function use can pay big dividends in efficient use of space. The base unit (beow, left) is approximately 6 feet x 6 feet square, making it large enough to serve as a staging area for full lengths of glass tubing that is stored in racks just to the left (not shown) of the unit. The work surface also serves as a prep/work area for the glass saw, drill press, lapping wheel and sink as well as the glassblower's lathe. Storage for tools is plentiful and easily accessible.
The casework shown in the right photo right serves as a barrier separating the student benches and customer service area from the main shop. The width/separation is intentionally deep at 5-1/2 feet. Glassware coming in for repair is staged here, minimizing customer and student exposure to sharp and broken glassware. Ample storage of glass parts is provided here and elsewhere in the shop.


Disclaimer: Glassblowing has inherent hazards that can result in burns, cuts, injuries or even death. While every effort has been made to convey best safety practices, the materials presented herein can not anticipate every possible risk or hazard associated with a given glassblowing activity. The reader is responsibile for assessing and mitigating any and all such hazards or risks before commencing any activity connected with his or her use of these materials. Neither the author nor ILPI assumes responsibility or liability for injuries, losses, claims or damages to the reader or other parties that may result from the use or misuse of these materials.
by Joe Walas and/or ILPI, all rights reserved unless otherwise stated. Unauthorized duplication or posting on other web sites is expressly prohibited. Send suggestions and comments (include the URL if applicable) to us by email.