An entire web site could be devoted to explaining the various kinds of regulators (high pressure,
corrosive gas, fluorine etc.) that are available! This page is not meant to be comprehensive, merely an introduction to regulators you might find in a typical inorganic or organic laboratory. If you are ever unsure about how to use a regulator or another piece of equipment, ask your laboratory supervisor or safety expert.
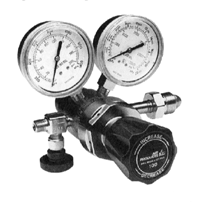
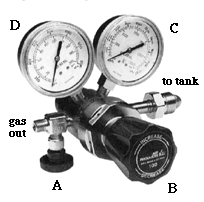
There are typically a wide variety of gas regulators in your average chemistry department. The majority of these are single stage and two stage regulators such as the one shown below.

The advantage of a two stage regulator is that the pressure flow remains consistent until the tank is nearly empty. Therefore, you might want to use a double stage regulator on a gas chromatograph (GC), but for a typical Schlenk line a single stage regulator would suffice.
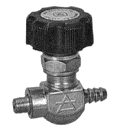
Two other common types of "regulators" that you might encounter are actually called flow control valves. Unlike a regulator, these DO NOT control pressure, only flow. However, they permit one to easily dispense gas from a cylinder. As they lack gauges, be extremely cautious when hooking a flow valve up to a vacuum line!!
The manual flow control valve shown below on the left is usually used on small cylinders (carbon dioxide, ethylene etc.) and the one on the right is typically used on lecture bottles. Small single and double stage lecture bottle regulators are also available.


Finally, note that you should NEVER use grease or oil on a regulator. Not only will it gunk up the inside and contaminate your reaction system, but these organic materials can react with the gas being dispensed. Never use an oxygen regulator for other gases. Cross-contamination of internal parts (especially with grease or oil) could cause a rapid oxidation and fire.
Not all regulators can be used on all cylinders. For example, flammable gases such as hydrogen require brass fittings. The
Compressed Gas Association (CGA) has devised a system that ensures accidental mix-ups can not occur. Each cylinder and regulator have connection fittings that are designated by a CGA number. Below are some common CGA numbers. High pressure tanks or lecture bottles require different fittings:
| Gases | CGA Connection # |
| Carbon dioxide | 320 |
| Boron trifluoride, hydrogen chloride, hydrogen bromide, hydrogen iodide, hydrogen sulfide, silicon tetrafluoride | 330 |
| Carbon monoxide, ethylene, hydrogen, hydrogen selenide | 350 |
| Acetylene, allene, butadiene, butane, butenes, cyclopropane, dimethylether, methane, propane, propylene, vinyl methyl ether | 510 |
| Oxygen | 540 |
| Argon, nitrogen, helium, noble gases | 580 |
| Air (industrial grade) | 590 |
| Boron trichloride, chlorine, nitric oxide, nitrogen dioxide, nitrogen trioxide, sulfur dioxide, phosphorous pentafluoride, many halocarbons | 660 |
| Anyhdrous ammonia | 705 |
CGA numbers are typically (but not always) stamped on the regulator just above the threads of the cylinder connection. Some will even state specifically which gas(es) for which they can be used. It is a very bad idea alter a regulator or use an adapter to "make" a regulator fit a tank for which it was not designed. This kind of deliberate tampering with a safety feature could lead to a serious accident.
 | Here's an example where someone hooked a nitrogen tank to an oxygen supply line, resulting in the deaths of 3 people. This is not an isolated example, either. |  |
Flammable gases have reverse threads meaning that the connection is tightened by turning the nut counterclockwise. You can always tell a reverse thread connection because the nut that you tighten has a line inscribed around its circumference. Compare the nut on the manual flow control valve (reverse threaded) with the one on the double stage regulator (regular thread) shown above.


 The Glassware Gallery

![]()