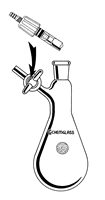
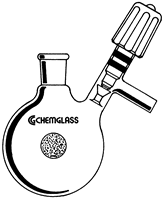
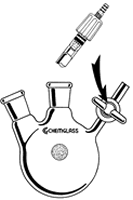
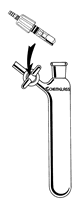
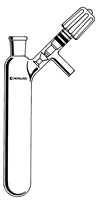
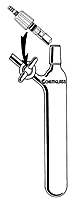
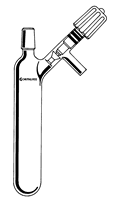
Schlenk flasks are simply round-bottom or pear-shaped flasks that have a stopcock or valve attached to them. The stopcocks are made out of glass or Teflon®, the latter being preferred because they are easier to clean and won't leach grease into your reaction mixture.
Schlenk flasks are indispensable tools for manipulating air-sensitive materials using techniques such as cannula transfers. There are many different varieties of shapes and sizes of Schlenk flasks; sketches of some common ones are shown below. The ones in the bottom row are commonly referred to as Schlenk tubes.
Click on any flask for more information or to order
The sidearm on the Schlenk flask permits the user to pull a vacuum on the flask or to fill it with an inert atmosphere such as nitrogen. The ground glass joint is used to connect the flask to other apparatus or is plugged with a stopper or rubber septum.
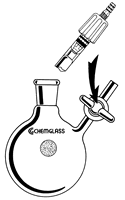
The main technique used with a Schlenk flask is counterflow. For example, to attach an empty addition funnel to a Schlenk flask you:
Connect (using rubber tubing) the sidearm to a nitrogen manifold and bubbler.
Open the sidearm valve and turn up the nitrogen flow (watch the bubbler). Hold on to the stopper so it doesn't pop off by itself!
Remove the stopper from the flask. Nitrogen will flow through the side arm and out the joint, protecting the contents from air and water.
Place the addition funnel on the flask and allow the apparatus to purge completely with nitrogen.
Place a stopper in the top of the addition funnel and reduce the nitrogen pressure on the manifold. Leave the sidearm valve open to the nitrogen manifold and bubbler. Adjust the nitrogen flow so that the bubbler bubbles once every few seconds.
Your system is now assembled and under a slight positive pressure of nitrogen. If you wish, you can add liquid to your addition funnel using a syringe or cannula. You're on your way!
by ILPI, all rights reserved. Unauthorized duplication or posting on other web sites is expressly prohibited. For questions, comments and concerns, please contact us.

 The Glassware Gallery
 flasks are simply round-bottom or pear-shaped flasks that have a stopcock or valve attached to them. The stopcocks are made out of glass or Teflon®, the latter being preferred because they are easier to clean and won't leach grease into your reaction mixture.