
|
Safety Emporium for all your lab and safety needs
 The Glassware Gallery
Glassblowing
Introduction
Ways to endear yourself to your local glassblower
- ALWAYS bring CLEAN glassware free of ALL chemical residues. Most glassblowers will refuse to work on a dirty piece of glass; many are insulted by someone who asks otherwise. Think about it; the glassblower will be blowing in and out of the hot pieces of glass to work the repair. Would you be willing to inhale unknown toxic substances and their combustion products?
- Realize that not every piece of work qualifies as an emergency rush job. Everybody with broken glassware would like to have their repairs made immediately. However, most glassblowers are backlogged and service is generally on a first-come, first-serve basis. Sometimes, a glassblower will help you out in a special case or give priority to teaching laboratory items, but that is up to him or her.
- Provide a GOOD measured drawing and discuss the repair or item to be made with the glassblower. Your glassblower is not a mind reader. Take suggestions from your glassblower on how to improve or simplify the design so that it is less prone to breakage and easier to clean.
- Some glassblowers appreciate it if you order the required parts, especially if they are expensive TeflonTM stopcocks rather than commonly stocked items such as joints. But note: glassblowers often get steep discounts on parts, so be sure to check with your glassblower and/or business office before placing an order for parts.
- Realize that some items are not repairable or salvageable. For example, a joint that has a crack running through it must be replaced. A fritted funnel with a crack running down the entire length is also generally not salvageable.
- Consider buying inexpensive items. It is a general waste of your glassblower's time and skills to have him save 30 cents each on four dozen low-cost items by, for example, ordering joint and flask blanks to make your own round bottom flasks.
- Annealing is critical to relieving stress. Glassblowers must place each piece in an annealing oven overnight to work out the stresses in the glass that can lead to catastrophic failure (take a look at the Scientific Glassblowing Learning Center's page on glass strain and annealing as well as the links therein for more info). Don't insist on having a piece as soon as the glassblower is "finished blowing"; a piece isn't finished until it has been annealed.
- Treat the glassblower with respect as you would any other staff member or colleague. Glassblowers go through years of apprenticeship training; it is much easier to hire a new professor than a new glassblower. In fact, some glassblowers earn more than some professors!
Doing it yourself
Safety Emporium carries all kinds of adapters for your laboratory needs.
Remember that your glassblower won't always be around to make repairs or create an adapter that you need right away. Moreover, if you perform sealed tube experiments, being able to seal a tube on a vacuum line is valuable skill to know. Some research groups like to seal NMR tubes to joints; you can have your glassblower do this, but if you need one in a hurry nothing beats doing it yourself.
You can learn elementary glassblowing on your own. All you need to do is get a bunch of tubing ranging from 5 to 15 mm in diameter (which is rather inexpensive) and practice. A little coaching from someone who is familiar with glassblowing also helps.
The most useful site on the web to teach yourself basic scientific glassblowing is The Scientific Glassblowing Learning Center, an extensive and comprehensive resource originally authored by glassblower Joe Walas and now part of our resource collection. Definitely check it out and print out the tutorials.
Always remember the first rule of glassblowing: Hot glass looks just like cold glass. That's one that you'll learn the hard way, someday. Guaranteed.
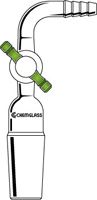
Stuck joints?
A stuck (or "frozen" or "seized") glass joint is a common problem when working with standard ground glass joints. To avoid having joints freeze, it is always a good idea to use grease every time you assemble a joint. Nonetheless, even with good greasing joints can still seize. Grease may be leached out by your solvent, especially if the reaction is refluxed. Solids stuck in the joint (such as salts from a reaction) can also cause a joint to seize.
Your glassblower can assist you with freeing a stuck joint, but if you don't have that option here are some techniques you can try.
| Caution: the following are suggestions only and can not apply to every situation. Trying to free stuck glass joints can result in serious bodily injury or death if the glass breaks in the process. Wear sturdy work gloves and wrap the glass in a heavy lab towel to lower the potential for serious cuts or injury. Do not use heat or flame if there is any potential for hazardous or flammable residues or vapors to ignite. If you are not comfortable with assessing or understanding the risk involved, do not attempt this yourself. Tendons in your hands and arms are very easy to sever and very difficult to repair! |
For the sake of argument, we'll assume that you have a stopper stuck in flask. If the material in the flask is not pyrophoric or hazardous (in case the apparatus breaks during your attempt to remove the stopper) here are some techniques you can try. The ordering here is approximate.

Safety Emporium carries stoppers and lots of other laboratory glassware.
- Gently rock the stopper from side to side. Remember those safety notes above; this is an easy way to cut your thumb, especially if you are not wearing leather gloves. Some people have luck putting solvent on the outside of the joint and trying to work it down into the joint as the stopper is rocked.
- If you are using a pennyhead (flat grip) stopper, put a lab towel over the head and loosely place a crescent (adjustable) wrench on the stopper. Do not let the metal touch the glass head. Try to rotate the stopper with the wrench, but don't apply so much force that you break the stopper (easy to do). If the stopper breaks and it's a hollow stopper, you'll have to smash out the remains of the stopper. If the stopper breaks and it's solid, well, move on to one of the other options.
- If you can clean and dry the flask (through a sidearm or another opening) to ensure there are no harmful residues or solvents present, you can try one or more of these options:
- Soak the joint overnight in a base bath (KOH/ethanol, for example). Some people swear that an overnight soak in Coca-ColaTM works quite well. Submersion in an ultrasound bath may help.
- Heating the joint briefly with a heat gun and then try to remove the stopper with rocking. Caution: do not try this on a closed system!!!
- Heat the joint in a cool (yellow) flame while rapidly rotating the joint. Caution: do not try this on a closed system!!! Use a glassblowing torch with just a touch of oxygen. Do not use a Bunsen burner. After a few seconds use your (gloved) hand and try removing the stopper.
- At this point you're more or less out of options. If this is a one-necked flask and you need to recover the material inside, deliberately breaking the stopper (if it is hollow) or the flask is about all that's left.